What is saddle-stitch binding? What it can and cannot do, and how to do it.
平田提When creating a ZINE, one important consideration is "what form the book will take." This is akin to its "presence." Will it have a spine? What about the feel and thickness of the paper, and how it feels when opened? The "binding method" largely influences these aspects.
There are two main binding methods commonly used for print-on-demand and ZINEs. The first is saddle stitching. This method involves stapling (or stitching) the spine and folding. The second is perfect binding. This style involves stacking and trimming a block of paper, then gluing the spine, which creates a visible spine.
This article will explain the characteristics of saddle stitching.
Advantages of Saddle Stitch Binding

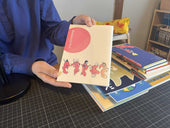
Saddle stitching is a binding method where the center of folded paper is fastened with wire, such as staples. You often see this in weekly magazines and pamphlets. There's also saddle stitch sewing binding, where a sewing machine is used instead of wire.
*These are also referred to as "wire stitching" and "sewn stitching," respectively.

Due to limitations in the number of pages and issues with paper shifting (creep), this method is recommended for ZINEs with fewer pages.
Relatively Low Cost
The printing cost for saddle stitching is relatively low, making it affordable and easy to produce even in small quantities. If the number of pages isn't too high and you don't have a specific preference for perfect binding, saddle stitching is a good choice.
Opens Flat (180 degrees)
The biggest feature of saddle stitching is that it opens flat to 180 degrees. This is ideal for ZINEs like maps or guides that are meant to be opened and used. The paper has less tendency to spring back, making it easy to open for people of all ages.
High Layout Flexibility
Because it opens wide, print content isn't swallowed by the gutter (binding area), making it well-suited for layouts that use the entire spread. There's also ample margin in the content area of the page, known as the "printing area" (hanzura).
Can Play with Wire or Thread Colors
For example, at Haguruma Printing, you can choose the color of the stapler wire, and at Retro Printing JAM, you can choose the thread color for sewn saddle stitching. This is also true if you do saddle stitching yourself. Being able to play with colors is a fun aspect, isn't it?
What Saddle Stitch Binding Cannot Do
Whether these are considered disadvantages is debatable, but here are some points to consider.
Cannot Have a Spine
Unlike perfect binding, a straight spine cannot be created. With perfect binding, if you know the paper weight and page count, you can calculate the spine thickness before printing. However, with saddle stitching, a straight spine is not formed, making it difficult to place text on the spine as intended.
Page Count Limit

As the page count increases, the central part bulges, causing the printing to shift, a phenomenon known as "creep." This bulge also creates a larger space in the middle. While it depends on the paper thickness (grammage) and type, DIY BOOKS often feature ZINEs with around 28-64 pages. Print-on-demand services also often have limits of 40 or 96 pages.
If the creep is trimmed, the central part (pages closer to the middle) will shift outwards (towards the fore edge). In such cases, applications like InDesign allow you to set creep compensation in advance. There are also calculation formulas, but for up to about 40 pages, you probably don't need to worry too much. If you're interested, please look into it!
*Creep can actually make pages easier to turn, and sometimes it's intentionally left in.
Please refer to the article below for a comparison with perfect binding.
・Related article: Perfect Binding or Saddle Stitching? Compare Features Before Making Your ZINE
If Saddle Stitching Yourself, Use a Saddle Stitcher (Stapler)

When saddle stitching yourself, using a saddle stitcher is the quickest way. DIY BOOKS uses the "Max BIMO 11." Since it allows depth adjustment to center for each size, we use two of these to stitch.
*Note that regular Max stapler staples are size 10, while this one uses size 11 (slightly thicker).
Recently, 180-degree opening staplers are available at 100-yen shops like Daiso. You can also saddle stitch with these, so try it out first.
For a certain thinness, saddle stitching with a home sewing machine is also possible, as is hand sewing. When using a sewing machine, please proceed with caution as it's not its original intended use.
How to Saddle Stitch
Here are some tips if you're saddle stitching yourself.
1. First, gather the printed papers and staple them in two places using a saddle stitcher or stapler.

2. While allowing the whole thing to puff up, press the fore edge (the side opposite the binding) against a flat object and fold with a bone folder or roller.
*The key is to "puff it up." If you immediately make the crease at this point, it often won't fold neatly.

3. It's most efficient to press down diagonally from the center towards the fore edge.

4. Finally, smooth out the entire fore edge vertically to complete.

Furthermore, if you stack 5-10 copies with the fore edge alternating and place them in a box with a weight on top, the creases will be more neatly formed.
・Related article: Names of Book Parts
・Related article: https://diybooks.jp/blogs/blog/my-gear
If wrinkles appear in the binding or the middle pages shift

If wrinkles appear in the binding when saddle stitching, it's possible the paper grain is short grain. For saddle stitching, it's difficult to bind neatly if the paper isn't long grain. First, check the paper grain.
If the middle pages shift, or if you can't change the paper grain, you might have success by roughly "chopping" the binding side by hand to create an indentation before smoothing it out with a bone folder or roller. Give it a try.
・Related article: What is Paper Grain? Long Grain, Short Grain, Which is Best for Saddle Stitching?
[Caution] Imposition before saddle stitching. Create a dummy book.
If you're saddle stitching yourself, for example, if you print ZINE data created page by page in Canva, the page order will be jumbled. In this case, you need imposition.
It's recommended to create a "dummy book" (tsukami-hon) by stacking blank paper. Prepare "number of pages to be printed ÷ 4" sheets (e.g., 8 sheets for 32 pages) and stack and fold them (without binding).

If you write the folios (page numbers) on this and open it one by one, you can check the actual page imposition. For example, page 1 will be opposite page 32, with page 2 and page 31 on its back, and so on. Saddle stitch binding requires this imposition, and in reality, when you place an order, the printing company handles the imposition. If you do this yourself, you need to consider it.
If you are creating spreads, you need to create the data in the imposed order in advance. However, if you create the data page by page, you can use applications like Adobe Acrobat to create imposition data.
For more details, please read the article about imposition!
・Related article: What is Imposition? Mastering the "Print Booklet" Function